作为一个 IT 行业的菜鸟,有的时候在网上浏览到一些好的技术文章,看过之后转头就忘记了,所以有一个自己的技术博客做一些记录是非常有必要的。但是个人博客虽然简单但是开发起来费时费力,而且如果要添加什么功能也非常的麻烦;SO 选一个开源的博客工具是一个非常好的办法。这里就记录一下使用 Hexo 和 Github pages 搭建个人博客的步骤、插件的集成和碰到的问题
那么为什么要使用 Github pages 来搭建个人博客呢?
- 支持绑定自己的域名
- 提交网站等同于上传自己的代码
- 提供免费的空间,而且就在自己的仓库里 (PS: 在服务器上维护自己的 Blog 真的很麻烦!!)
安装 node 和 npm
Hexo 是使用 nodejs 开发的,所有如果要使用 Hexo 的话首先要安装 nodejs 和 npm (PS: git 也是必须要的,但是这个我就不记录了,不然太 low! 哈哈哈哈哈),至少安装 6.9 版本以上的 node。下面记录一些 Mac 系统使用 Homebrew 安装 node 和 npm 的过程;如果是 windows 用户的话可以参照 廖雪峰的博客 中的 安装Node.js和npm
Homebrew 安装
- 安装
1 | brew install node && brew install npm |
- 查看结果

安装 Hexo
- 安装
hexo-cli命令行工具:npm install hexo-cli -g - 创建工作目录并初始化
hexo:mkdir hexo && cd hexo && hexo init - 运行
npm:npm install
经过上面步骤基本上博客的基本框架就已经搭建好了,这个时候我们可以先在本地运行一下看一下效果;运行 hexo g && hexo s (PS: 关于 Hexo 的命令可以查看 Hexo官方文档)
修改站点配置文档
网站基础配置,修改站点配置文件 _config.yml
1 | # Site |
Git 仓库配置
使用 git 作为提交方式需要先安装插件 npm install hexo-deployer-git –save
1 | # Deployment |
安装 Next 主题
Hexo 在我看来最大的特点 (PS: 也是我选择它的原因) 就是可以根据自己的喜好来选择主题和集成插件。在 Github 上有很多别人写好的主题可以拿来用;包括官方也提供了不少主题可以选择: Hexo官方主题;当然如果有那个能力的话自己写一套主题也是不错的选择。经过比较之后我选择使用 Next 主题,因为该主题集成了不少插件基本上可能需要使用到的都会有;而且主题样式也不错。这里我只写基本步骤,具体的 Next 主题配置可以查看 Next官方文档
安装主题
1 | git clone https://github.com/theme-next/hexo-theme-next themes/next |
修改站点配置文件 _config.yml 中内容
1 | # Extensions |
修改 Next 主题的页面风格, 编辑主题配置文件 themes/next/_config.yml, Next 提供了 4 中页面风格可以使用,可以根据自己的喜好选择
1 | # Schemes |
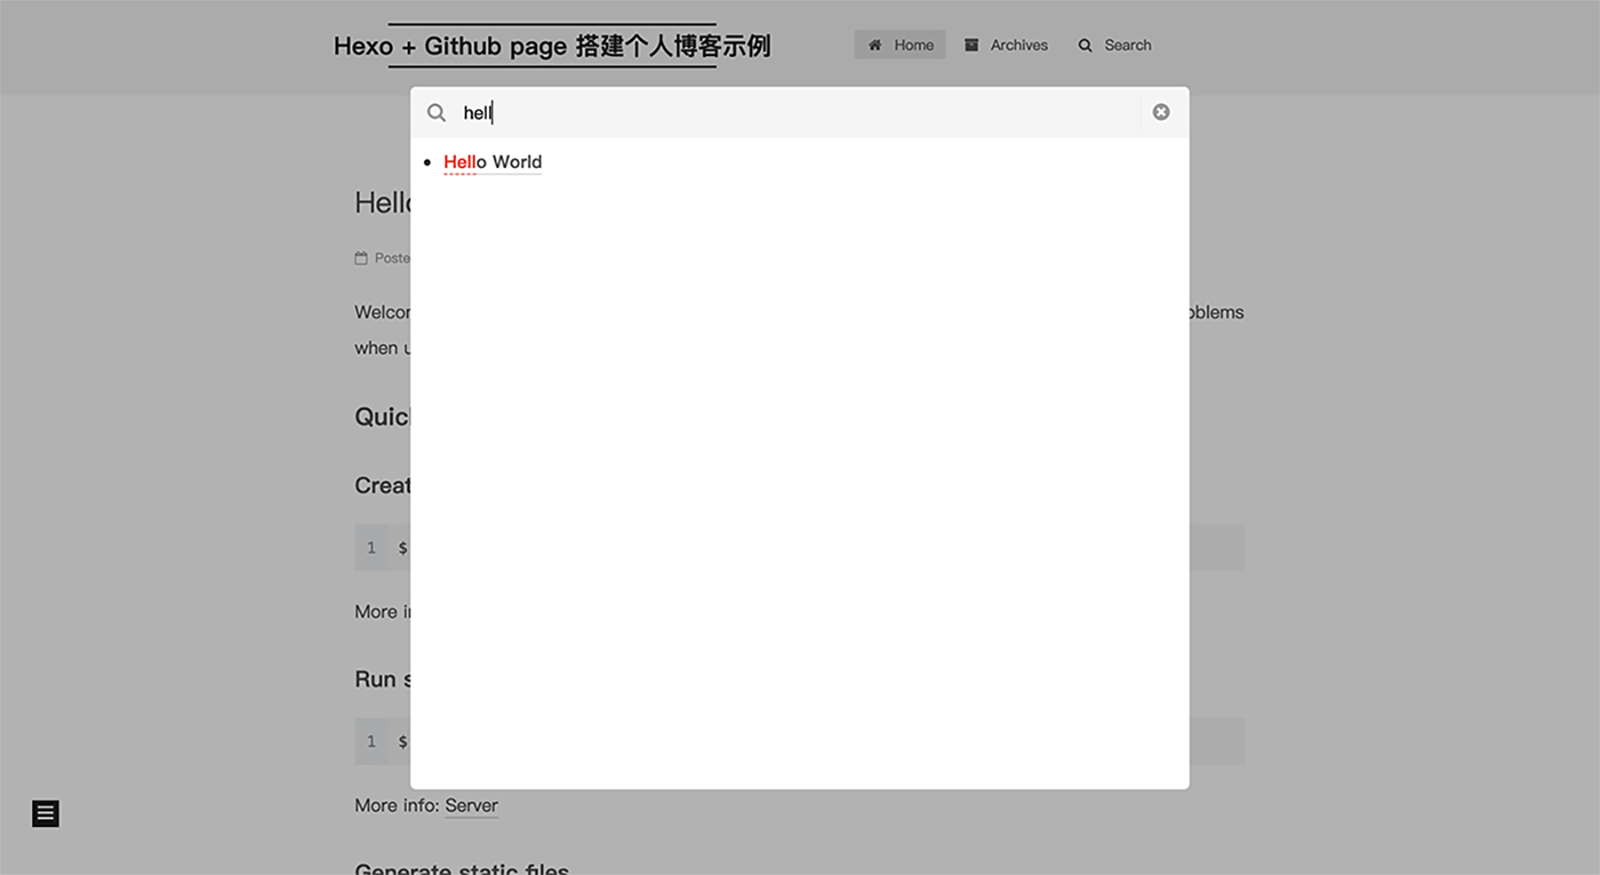
开启本地搜索插件
安装 hexo-generator-searchdb,在站点的根目录下执行以下命令:
1 | npm install hexo-generator-searchdb --save |
编辑站点配置文件 _config.yml, 添加以下内容到任意位置
1 | # Local search plug-in configuration |
修改主题文件 themes/next/_config.yml
1 | # Local search |
效果
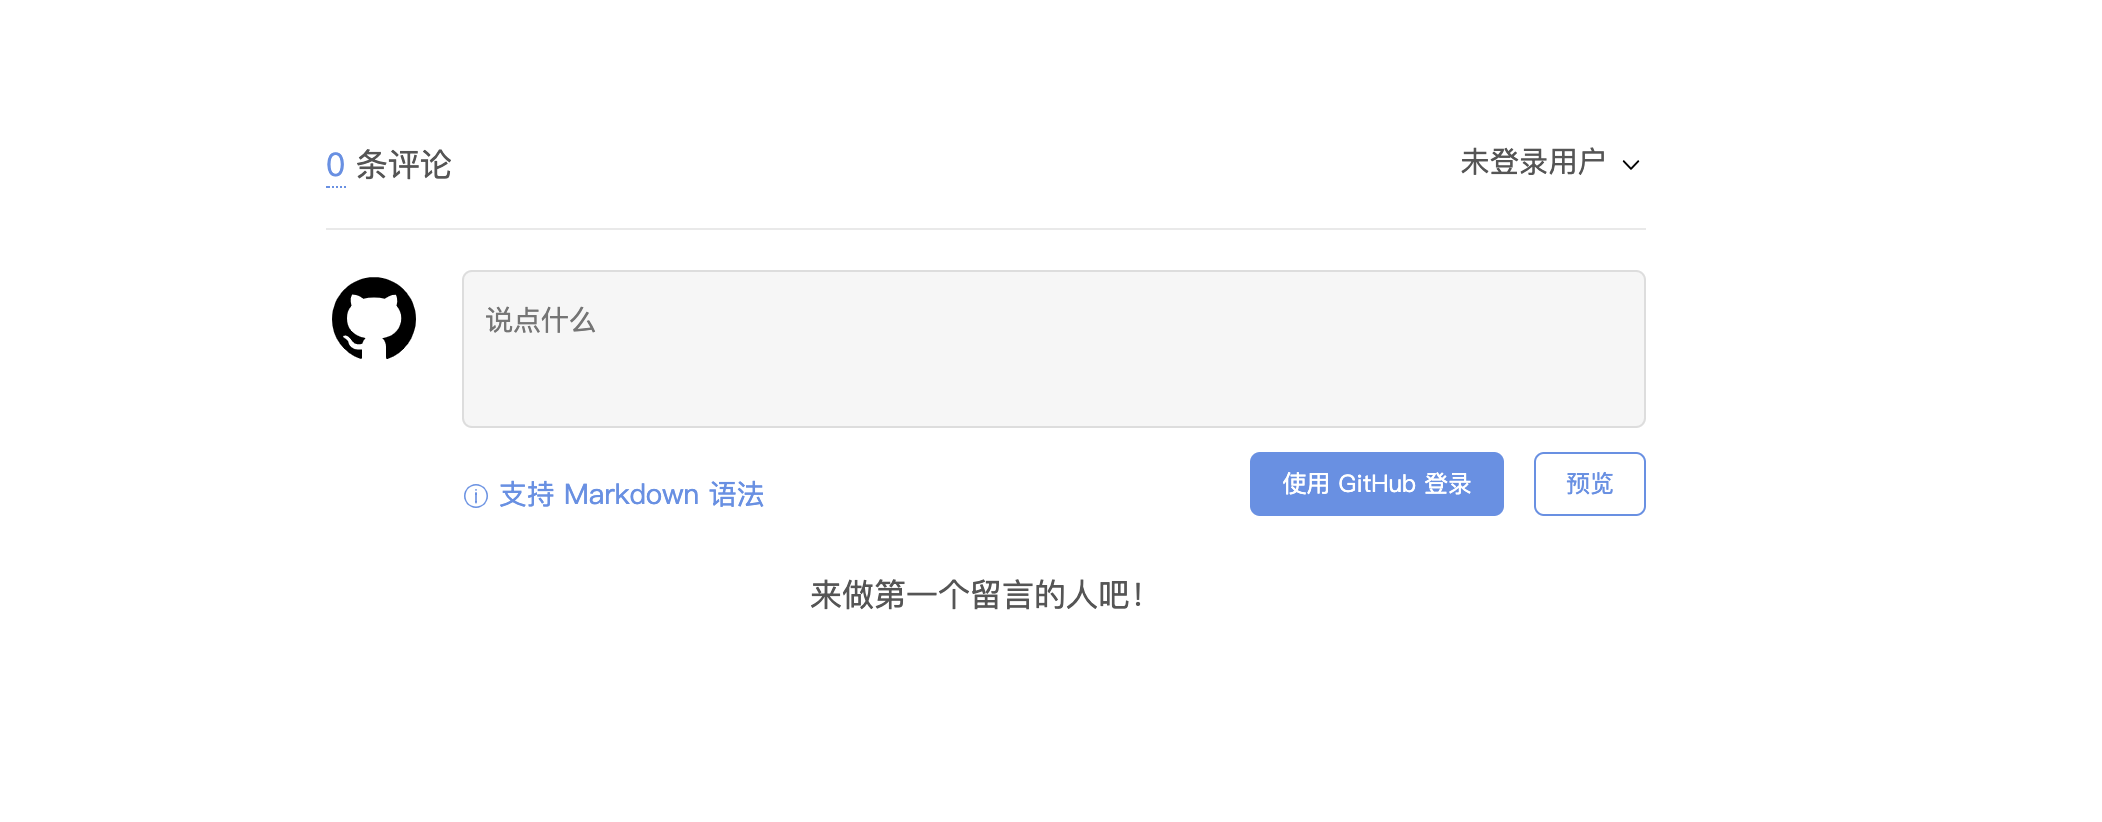
给博客添加 Gitalk 评论插件
Next 主题原生支持几种评论插件,其中包括 disqus 和 gitment (PS: 个人觉得这两个比较好用);但是 disqus 对国内的网络支持非常的不好 (PS: 国内嘛很正常),所以我原本选择的是 gitment,集成好 gitment 之后发现用不了;包括现在集成了 gitment 的博客好像都出了问题。在解决的过程中发现了 Gitalk,基本和 gitment 一样
申请 Github application
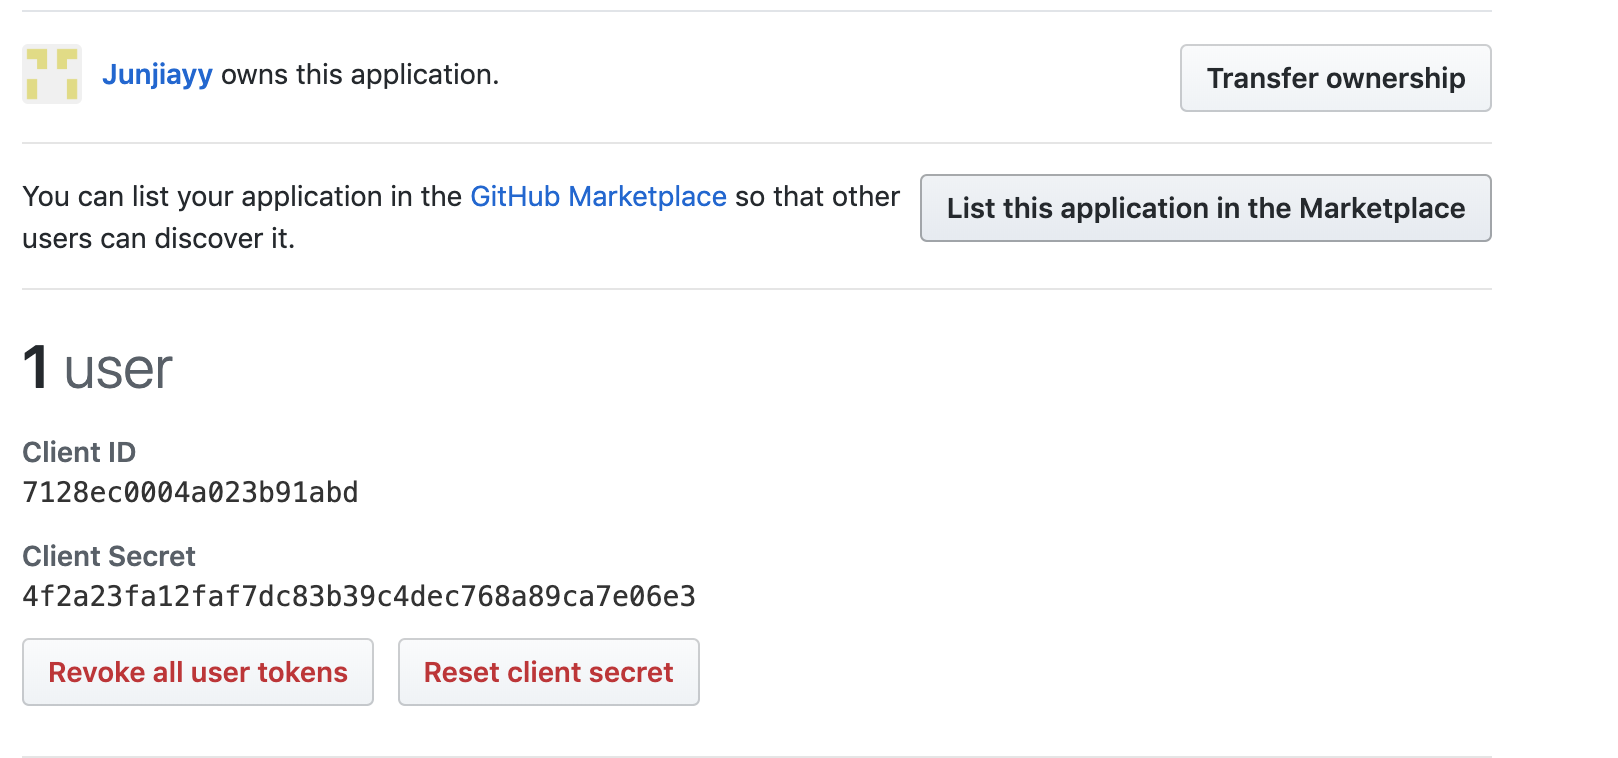
Gitalk 是一个利用 Github Api, 基于 Github issue 和 Preact 开发的评论插件;由于需要调用 Github Api 需要先申请一个 Github Appliction 用于认证登录。 申请链接
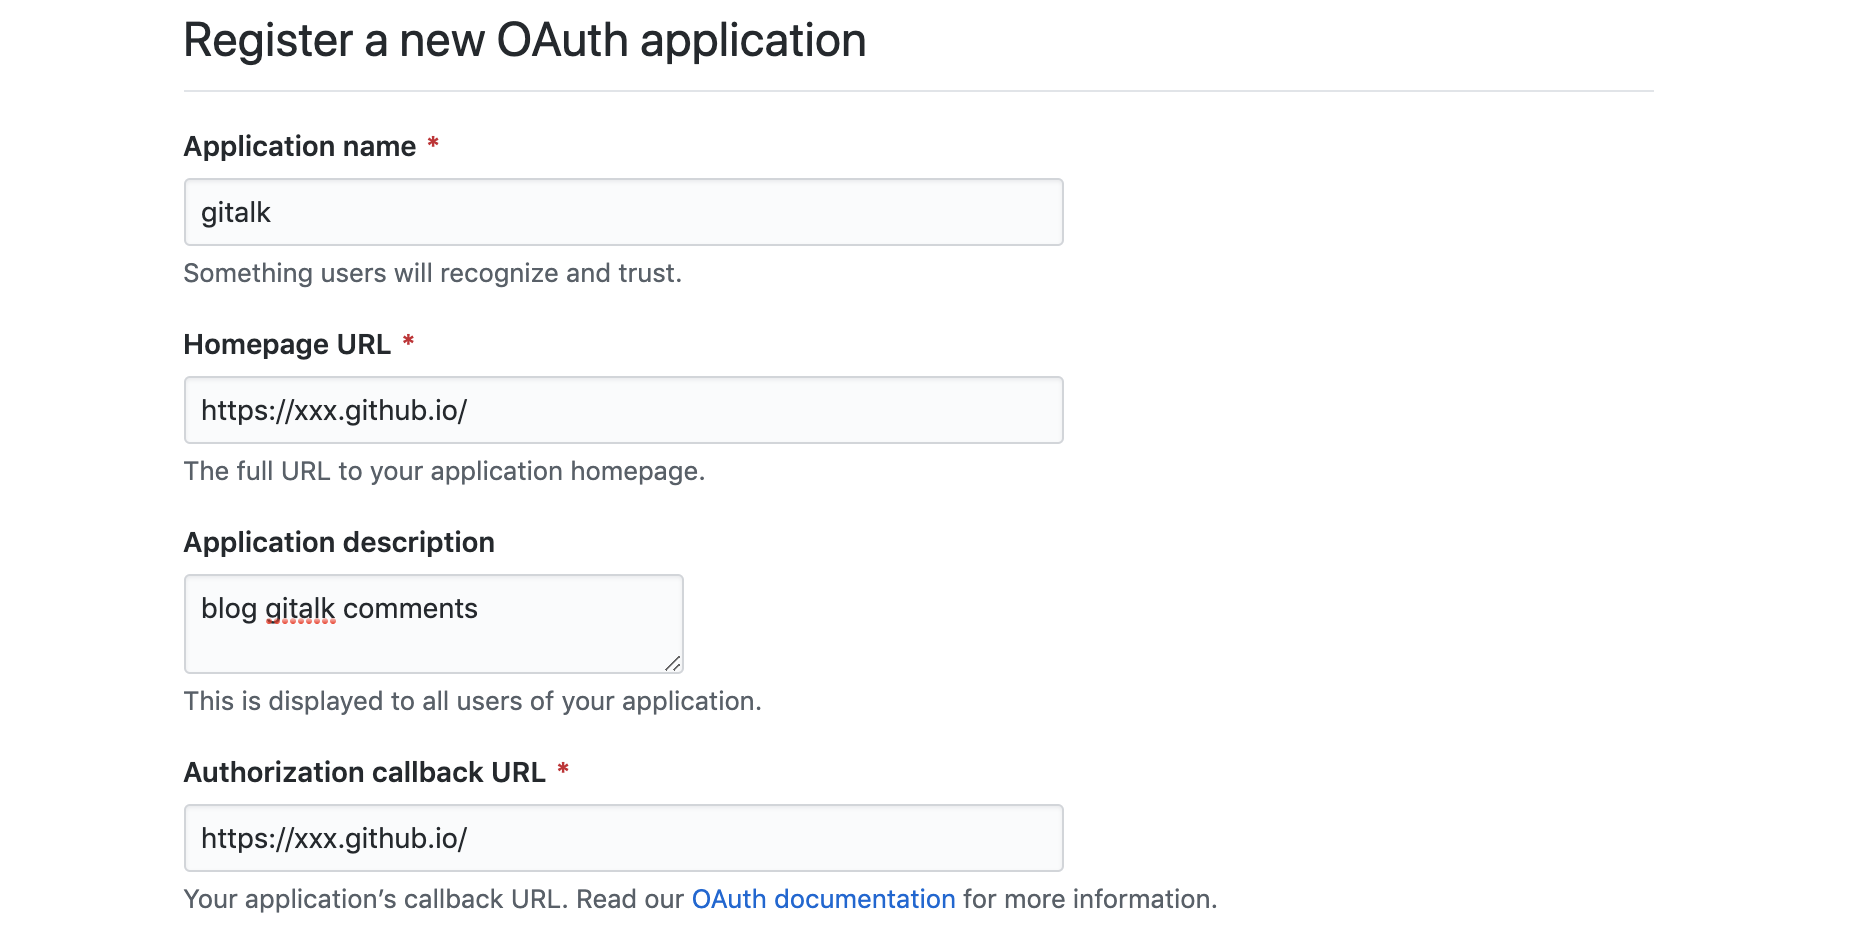
点击注册之后,跳转到如下页面;其中的 Client ID 和 Client Secret 是需要使用到的。
在 Next 中集成 Gitalk
因为 Next 主题并不是原生支持 Gitalk 的,所以需要自己手动的集成到主题中。
新建 themes/next/layout/_third-party/comments/gitalk.swig 文件,并添加内
1 | {% if page.comments && theme.gitalk.enable %} |
修改 themes/next/layout/_partials/comments.swig,添加内容如下,与前面的 elseif 同一级别上
1 | {% elseif theme.gitalk.enable %} |
修改 themes/next/layout/_third-party/comments/index.swig,在最后一行添加内容:
1 | {% include 'gitalk.swig' %} |
新建 themes/next/source/css/_common/components/third-party/gitalk.styl 文件,添加内容:
1 | .gt-header a, .gt-comments a, .gt-popup a |
修改 themes/next/source/css/_common/components/third-party/third-party.styl,在最后一行上添加内容,引入样式:
1 | @import "gitalk"; |
在主题配置文件 themes/next/_config.yml 中添加如下内容:
1 | gitalk: |
效果